Hyper Backup provides an intuitive and complete backup/restore solution to help you retain/restore important data copies and restore application and system configurations to a previous point in time. It supports backing up data to a local shared folder, to external storage devices on the Synology NAS (such as USB), remote Synology NAS, file servers, and cloud services. This article demonstrates how to create a multi-version backup copy to a remote Synology NAS or file server.
Note:
For more information on how to back up your data to other destinations, see the following tutorial:
Hyper Backup backup to local shared folder or USB
Hyper Backup backup to cloud service
1. Install Hyper Backup
If Hyper Backup is not already installed on your Synology NAS, perform the following steps:
Sign in to DSM and go to the Suite Center. Search for Hyper Backup and download the kit.
Make sure your Synology NAS is running DSM 6.0 or above. Hyper Backup is not supported for users of older versions of DSM.
2. Create a backup task
This section demonstrates how to create a backup task that is backed up to a remote Synology NAS or file server.
1. Open Hyper Backup.
2. Click the + icon in the lower left corner and select the data backup task.
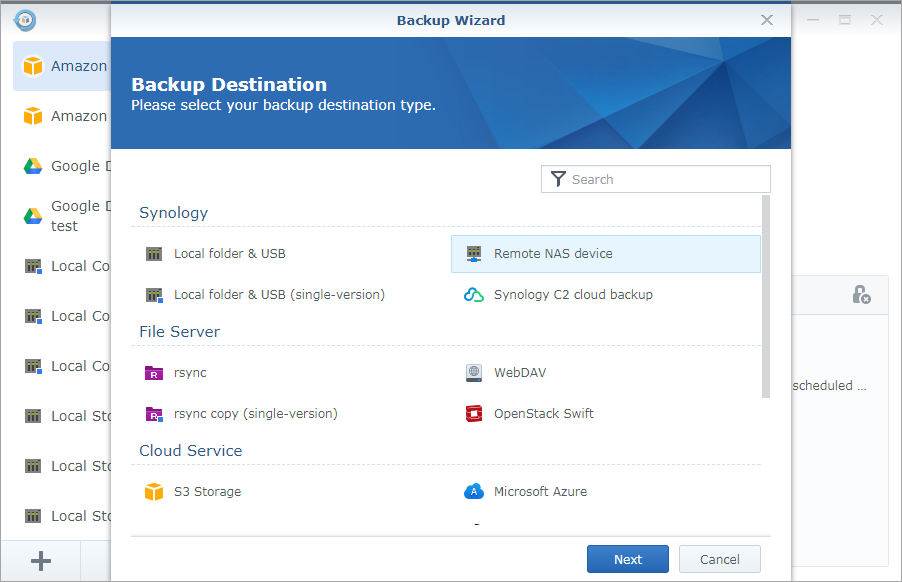
3. On the Backup Destination page, if you want to back up to another Synology NAS, select the remote NAS device. To back up to a file server, select one of the options in the File Server section. (Note that rsync replication only supports single-version backups.) After selecting a destination, click Next.
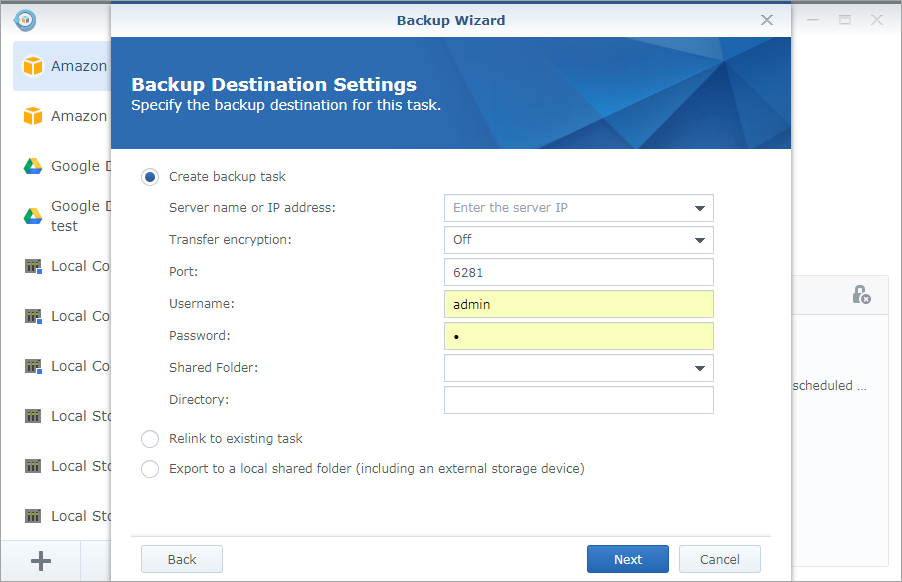
4. On the Backup Destination Settings page, select Create Backup Task and enter the information required to connect to other NAS devices or file servers. Because the process of backing up to the above two destinations is similar, only a step-by-step screenshot of the remote Synology NAS backup is provided here for reference. Enter the IP address and account information of the remote NAS to connect to it, then select a shared folder as the backup destination. You can also change the name of the directory in which the backup data can be found.
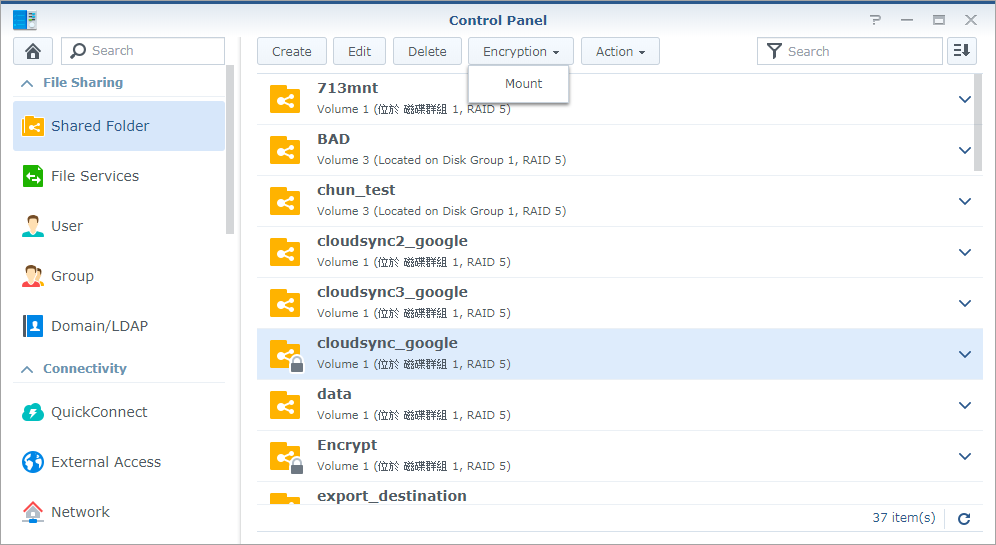
If the selected backup destination is an encrypted shared folder, make sure it is loaded. Otherwise, it will not appear in the list of shared folders.
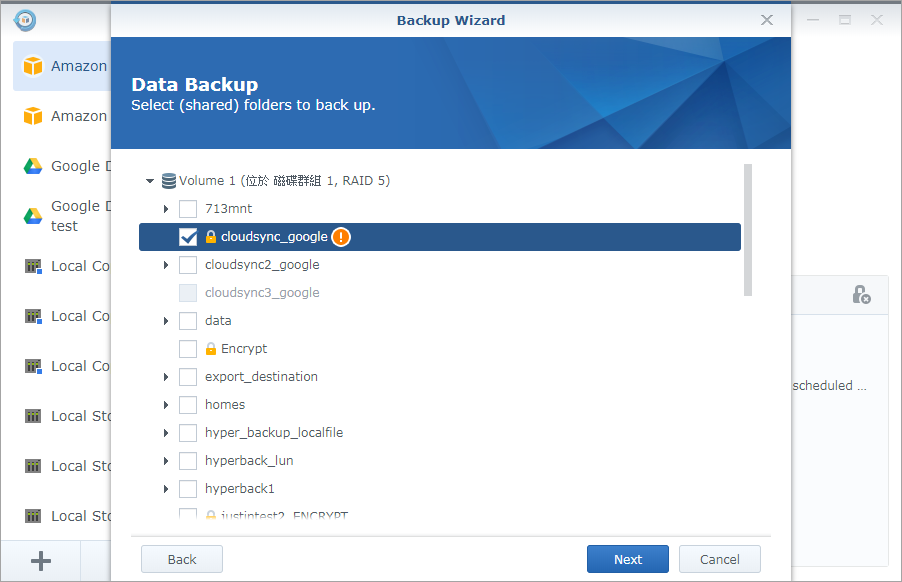
5. Select any source folder to back up the data it contains. If you choose to encrypt shared folders, you must keep loading during the backup process. If the source and destination are on the same volume, the source folder will be marked with an orange exclamation point.
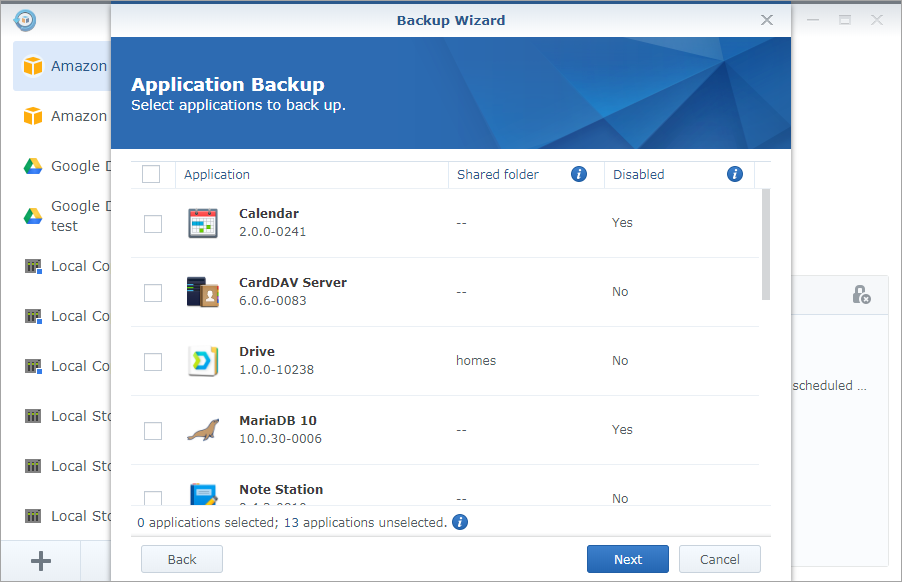
6. Select the application you want to back up.
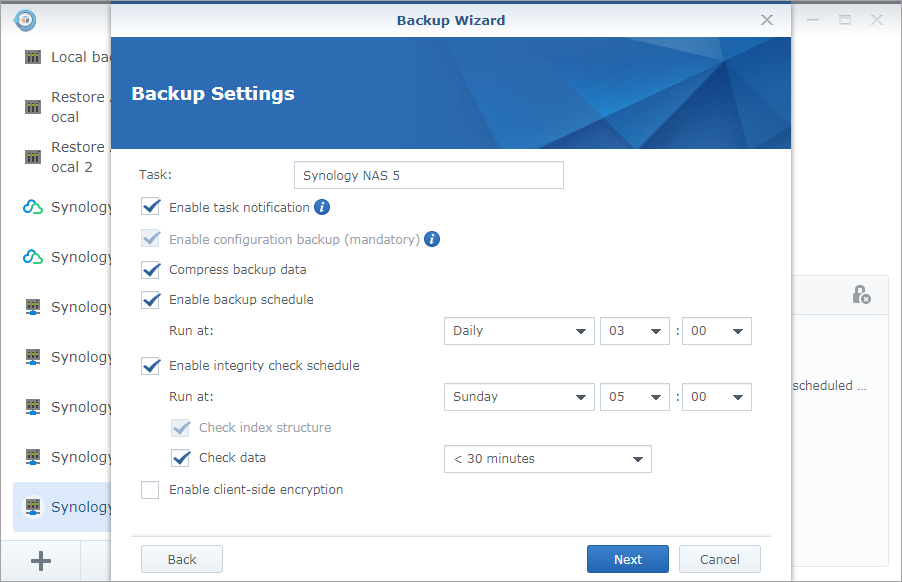
7. Specify the following backup settings to suit your needs:
• Task: Name the backup task.
• Enable task notifications: Select to notify you of the status of the task via email, SMS or push service.
• Enable configuration backup: Back up system configuration (eg, user credentials). This setting is enforced by default for all backup tasks.
• Compress backup data: Compress backup data to reduce the usage of destination storage. If you choose this option, you will need more backup time.
• Enable backup plan: Select when the scheduled system should automatically perform backup tasks.
• Enable Integrity Check: Select Schedule Automatic Integrity Check (which checks stored data and detects corruption) to run at a specific time to ensure data reliability. Index checking is enabled by default, but can be set to limit the time spent on data checking.
• Enable client encryption: Select to protect the backup data with a password to avoid unwanted access on the destination side. Note that restoring the data backed up in this task requires the password used here for encryption. Therefore, losing this password can result in permanent data loss.
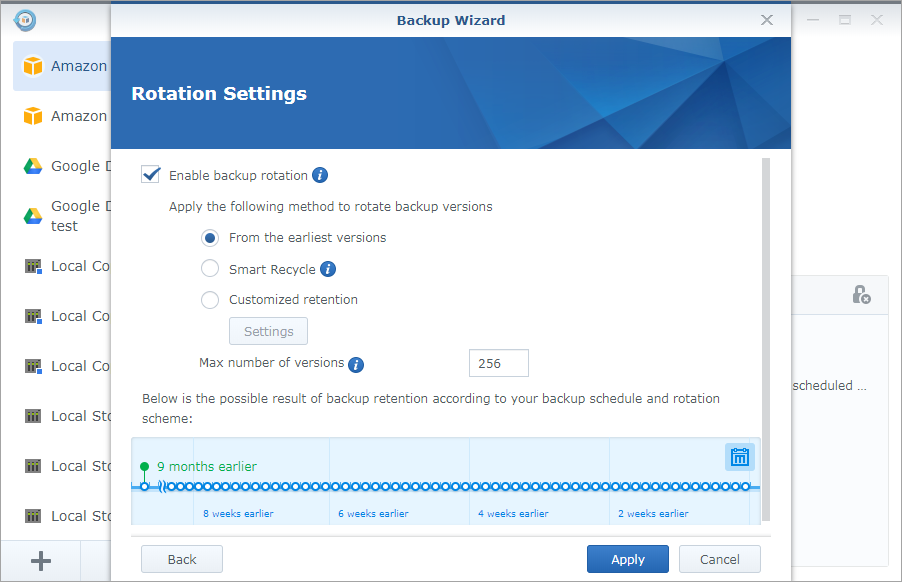
8. Select Enable Backup Rotation to set the rotation scheme:
• From the earliest version: The oldest backup version will be deleted when the specified number of versions is exceeded.
• Smart Recycle: Each backup version will be retained until the specified number of versions is exceeded. After the rotation trigger, the system will first rotate the version that does not meet any conditions; if all existing versions meet the following conditions, the system will rotate the oldest version:
•• Hourly version in the past 24 hours: The system will retain the oldest version created every hour.
•• In the past 1 day to 1 month, the daily version: the system will retain the earliest version created every day.
•• Last week, the weekly version: The system will retain the earliest version created each week.
• Number of versions: Set the upper limit of the backup version that may be retained.
• Timeline: Shows possible backup retention results based on backup plans and rotation scenarios.
9. Click Apply to complete the setup.
10. To perform the backup task immediately, follow the instructions of the backup wizard and click Yes.
3. Modify task settings
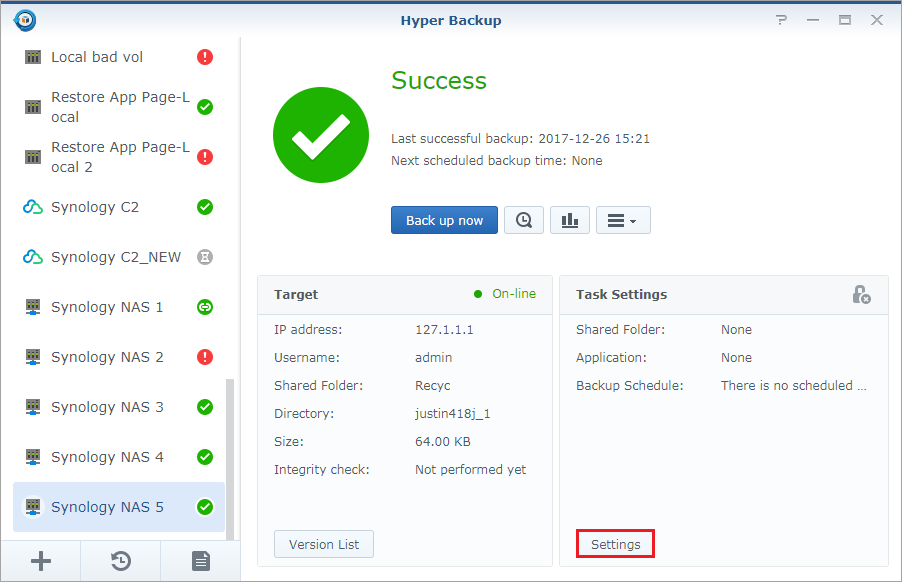
If the backup task is successful, the system will display a green tick icon on the interface. You can always change the folders and applications you want to back up, or modify your backup plan or rotation strategy by clicking the Settings button in the lower right corner.
