

Note:
For more information on how to back up your data to other destinations, see the following tutorial:
Back up to cloud services with Hyper Backup
Use Hyper Backup to back up to a remote Synology NAS or file server
Because it is afraid that if the system collapses and the data is exported, it will not use the RAID backup method that comes with Synology. Instead, it uses a single Basic method, that is, one data is only in one hard disk in the NAS.
But what if the hard drive is broken? Still have to save the same data in two hard drives, equal to 1 data = 1 NAS + 2 hard disk backup.
It should be difficult to have a broken system and two or more hard drives at the same time. Tr
SO, the problem that needs to be solved is:
Sync data back to more than two hard drives in the NAS
Synology has an official backup software: Hyper Backup.
Ensuring data security on your Synology NAS requires a reliable backup plan. With Hyper Backup, retrieving data from multiple recovery points with less storage overhead is no longer a problem.
Comprehensive backup destination
Backup destinations can be local shared folders, external devices, another Synology NAS, rsync server, or public cloud services such as Google Drive, Amazon Drive, Dropbox, Microsoft Azure, S3 compatible storage, and cloud backup services for exclusive Synology users. Synology C2.
Install and use
1. In the kit center of the DSM system, search for the Hyper Backup software and install it as shown:

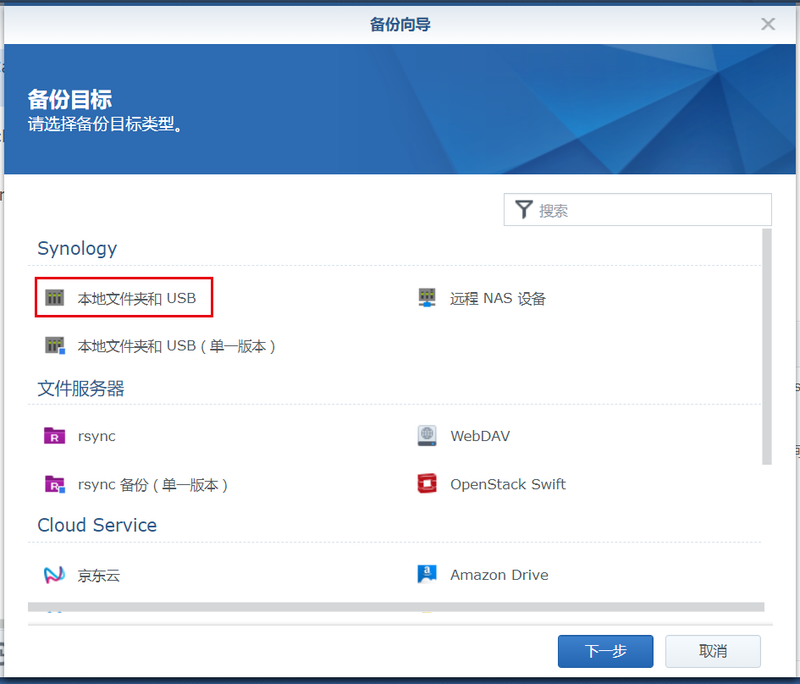
2. After the installation is complete, enter the software and click the “+” in the lower left corner to enter the backup wizard. As shown below, there are a variety of backup methods, because I am preparing to back up data from one hard disk to another in the NAS, so I chose the first method: local folder and USB.
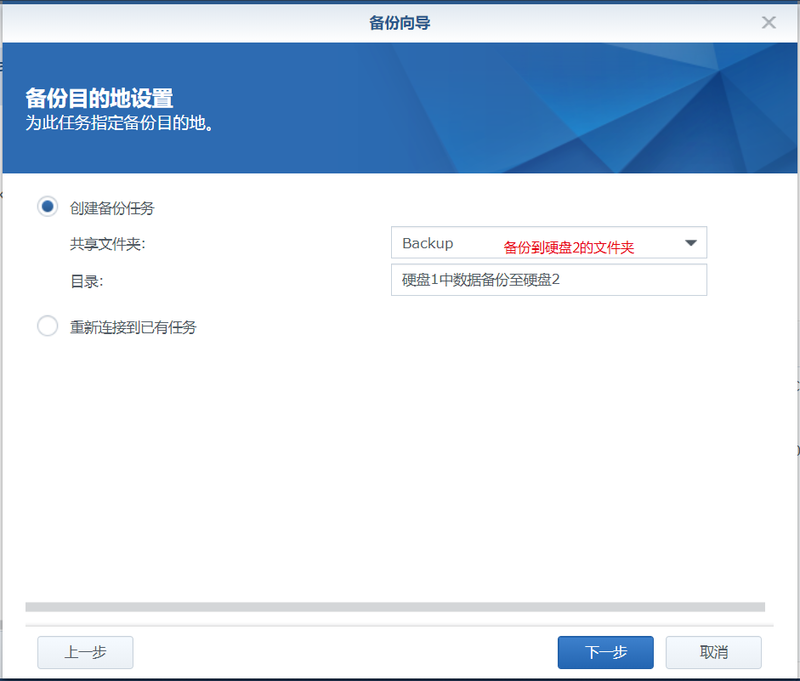
3. Next, the backup destination settings, specify the backup destination for this task. Select the target folder to be backed up and set the directory name.
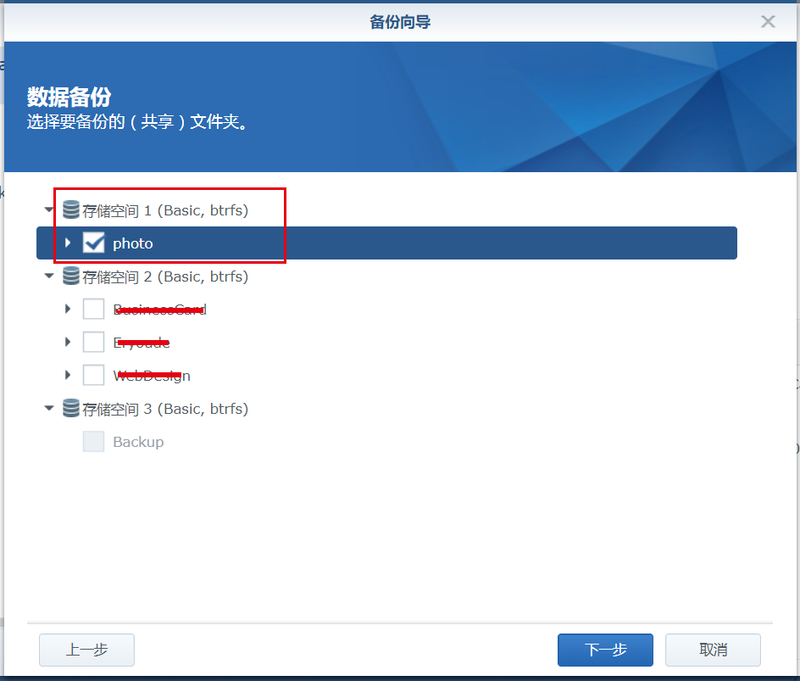
4. Next, data backup, select the shared folder to be backed up. Check the photo folder (that is, the file that needs to be backed up in the hard disk 1), and back up the photo file in the hard disk 1 to the hard disk 2.
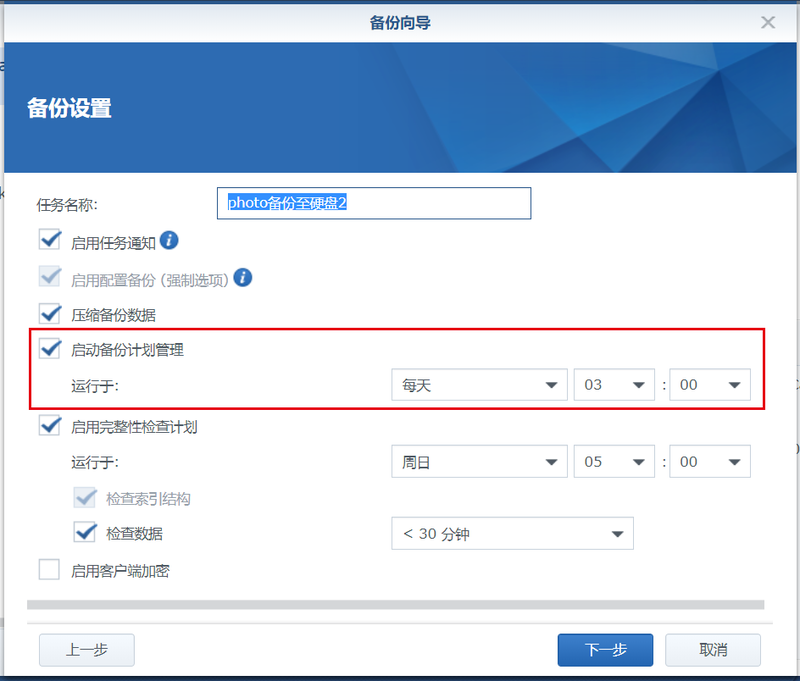
5, the next step, application backup, select the application to be backed up, this step has no choice, direct next step, backup settings, set a task name, and automatic backup plan, you can set a regular daily / weekly backup.
6, rotation settings, you can enable backup loop or not enabled. When enabled, the version of certain data will be saved. As shown in the figure, it will be set to 256 versions, but it will also increase the backup file space.

7, application, loading is complete, you can click to start the backup immediately, or automatically back up later. If you need to change the above configuration information, you can click the edit button below to reset.

8. This completes the backup of the photo folder in the hard disk 1 from the hard disk 2, and will be backed up regularly, as long as the NAS is in the boot state.
At the same time, you can use Hyper Backup to set up more backup methods: data backup tasks and LUN backup tasks;
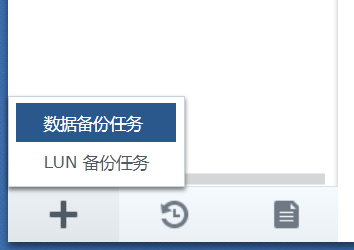
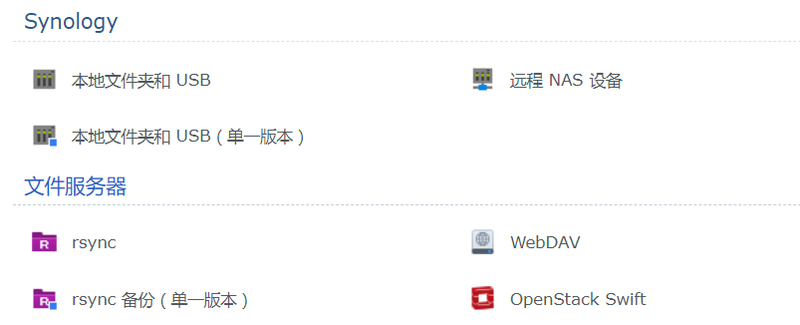
Data backup tasks: Synology, file server;
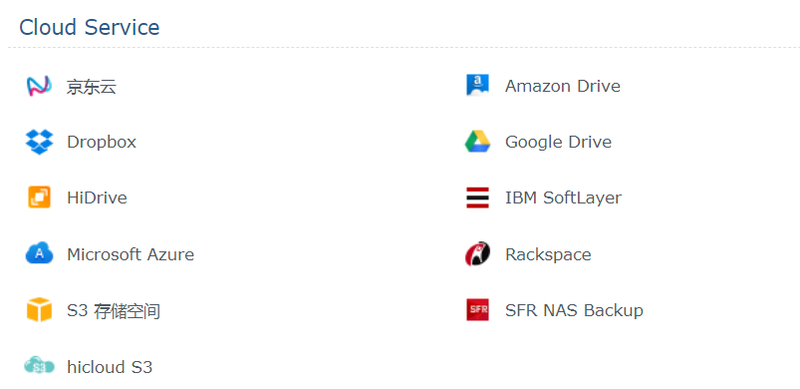
Data backup task: Cloud Service;
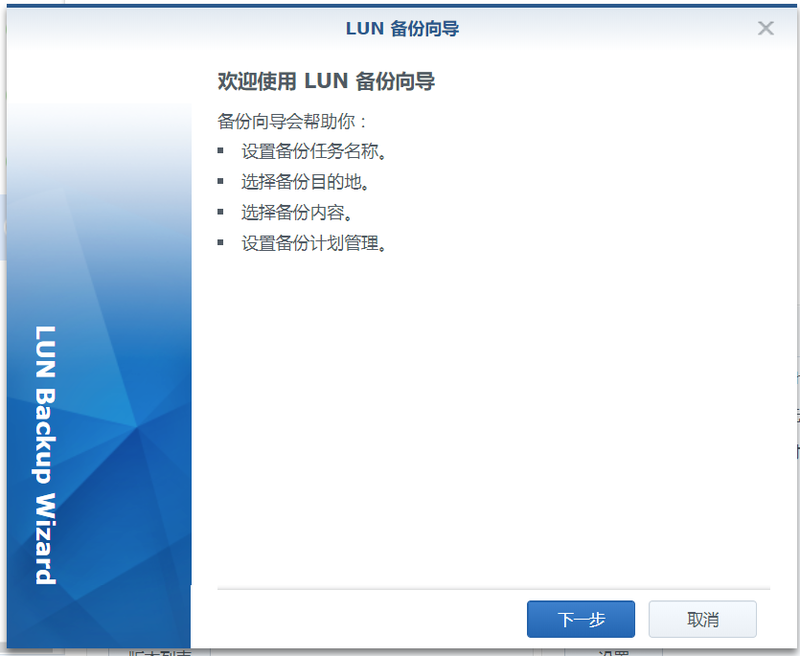
LUN backup task;
Other needs can be selected as needed.
