

Synology nas network storage After the device is in hand, look at the back of a simple device, the simple hard drive slot in front, Status indicator, power button may also have USB interface, there is no other thing on the back-end power port, fan, USB port, network cable port, etc. After installing the hard disk and plugging in the power, do not know how to set it? We first installed the hard disk, power on and then plug the network cable into the link nas with its own computer, similar to the first configuration of the router.
First of all, our group nas nas are not systematic, first go to the synology official website to download DSM firmware and installation tools.
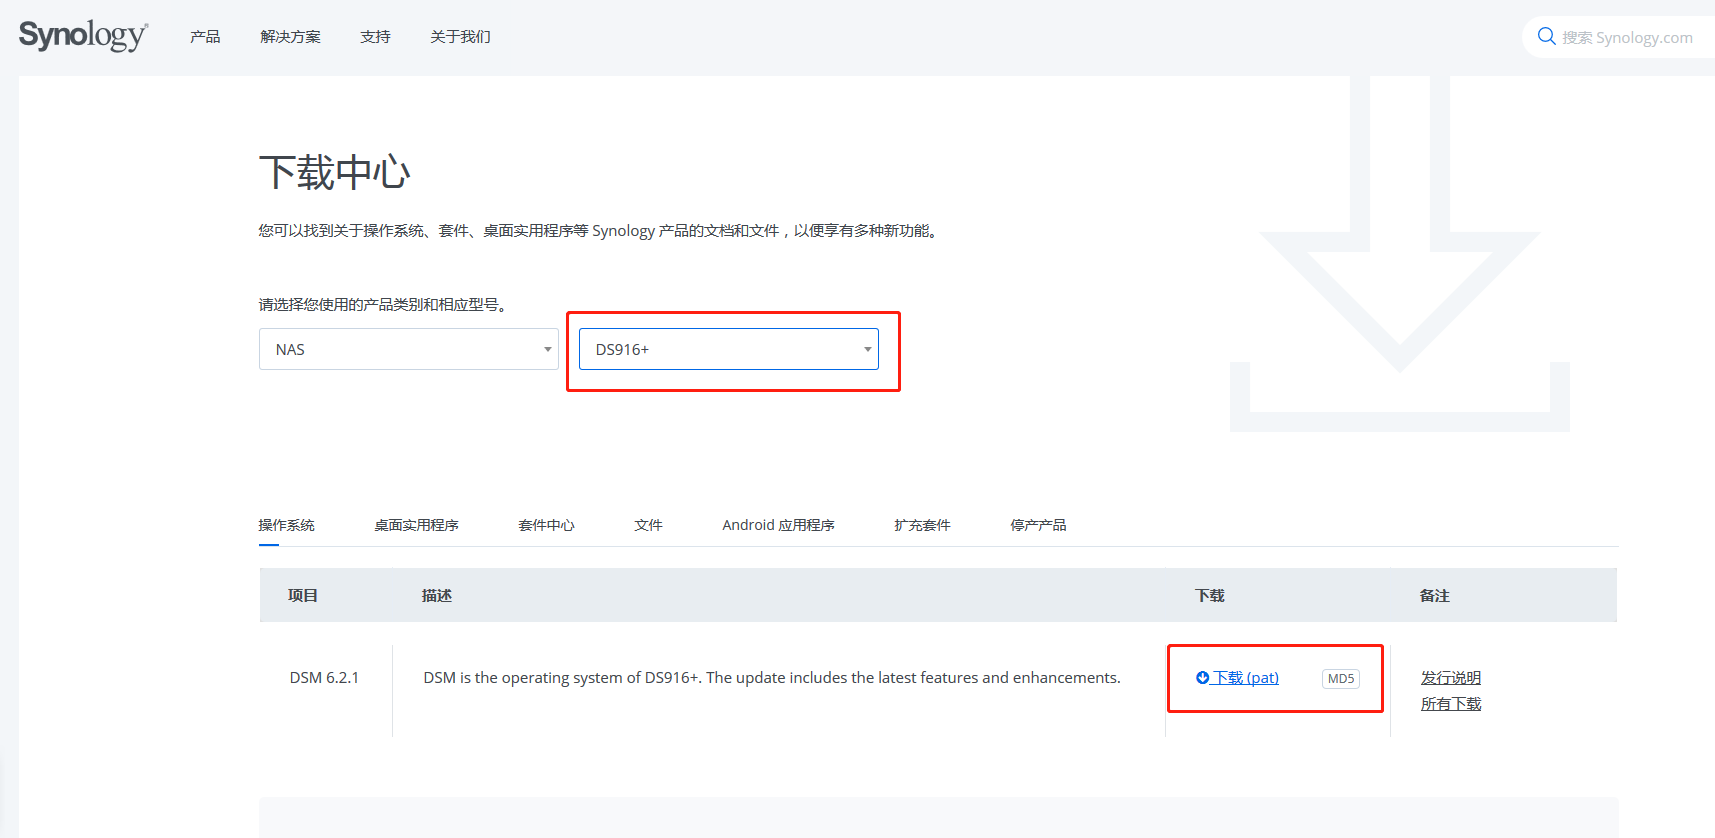
Https://www.synology.cn/en-us/support/download
Select the model of your machine, then download the pat file and install the assistant Synology Assistant

Synology Assistant will download the corresponding version according to the operating system connected to your network cable.
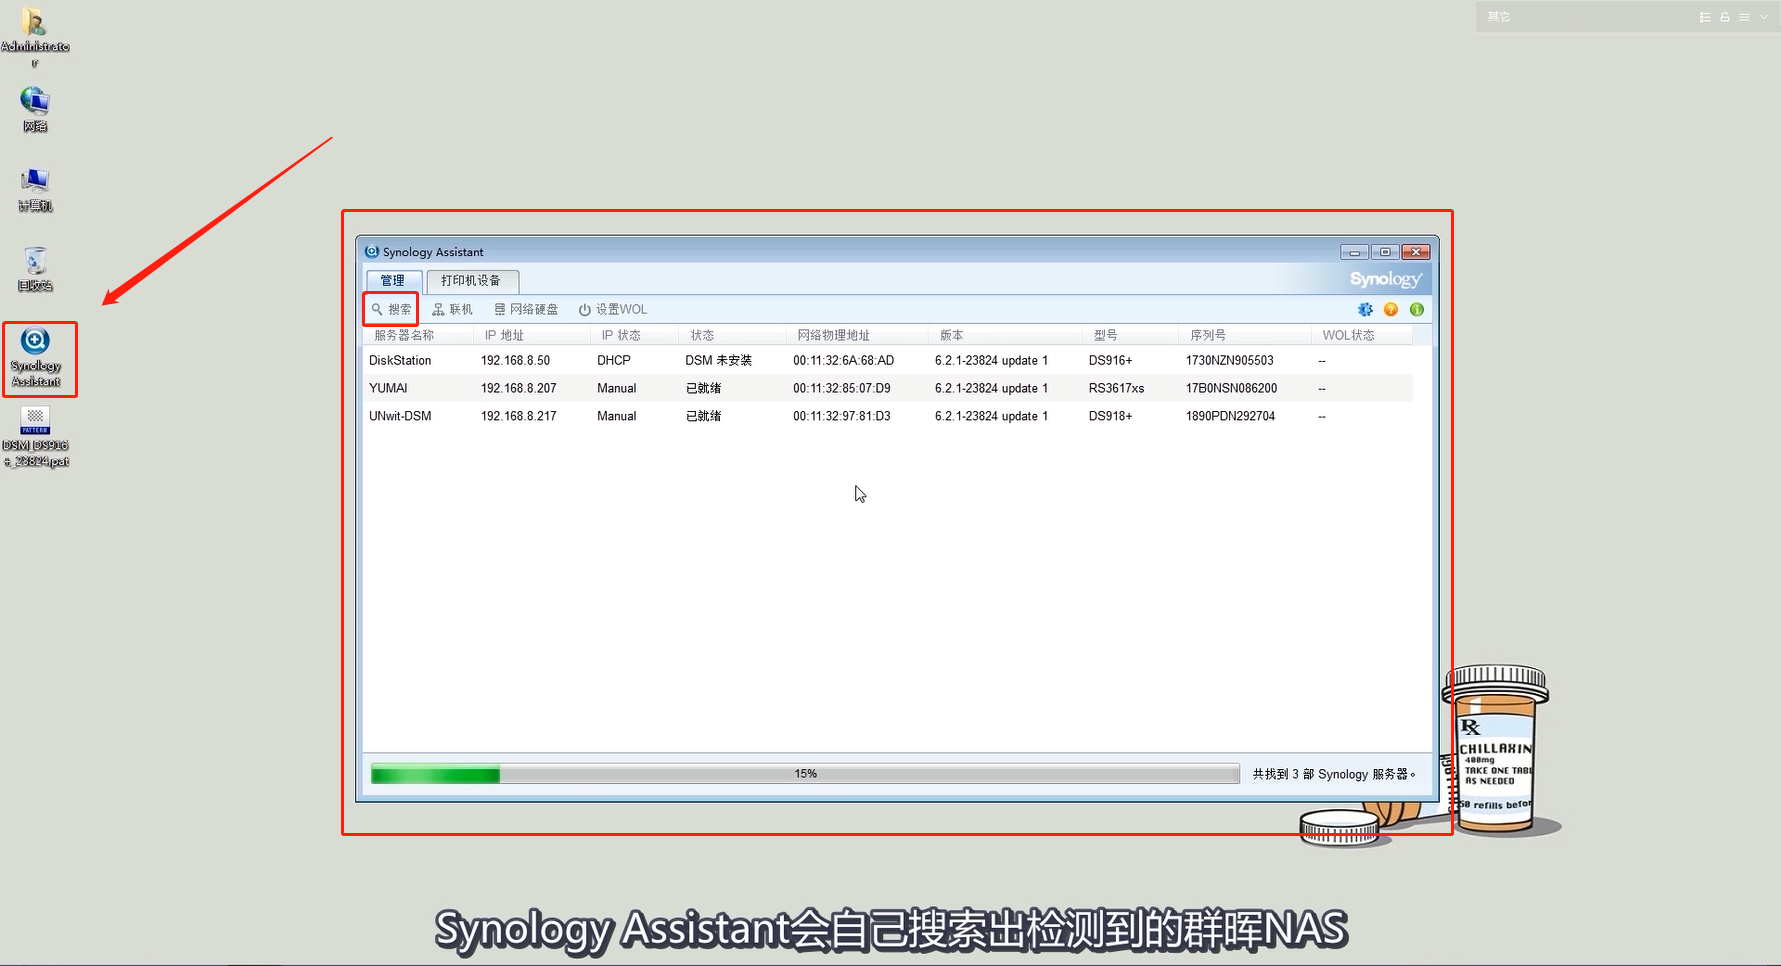
First install the new software, install Synology Assistant, and then open the Synology Assistant software to scan the Synology NAS network storage device in the same network.
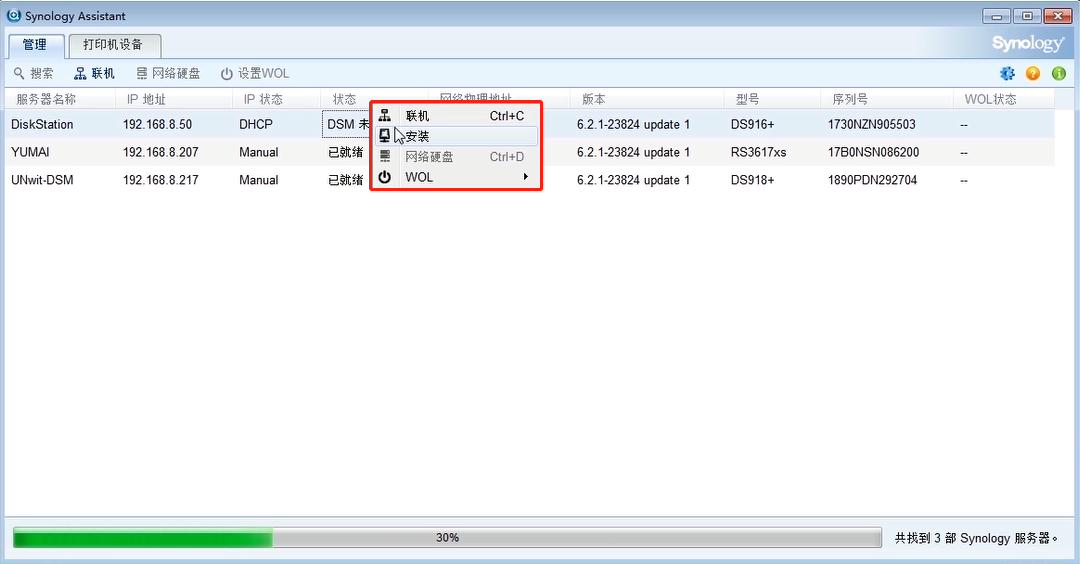
After finding it, right click on the machine that DSM does not install and choose to install.
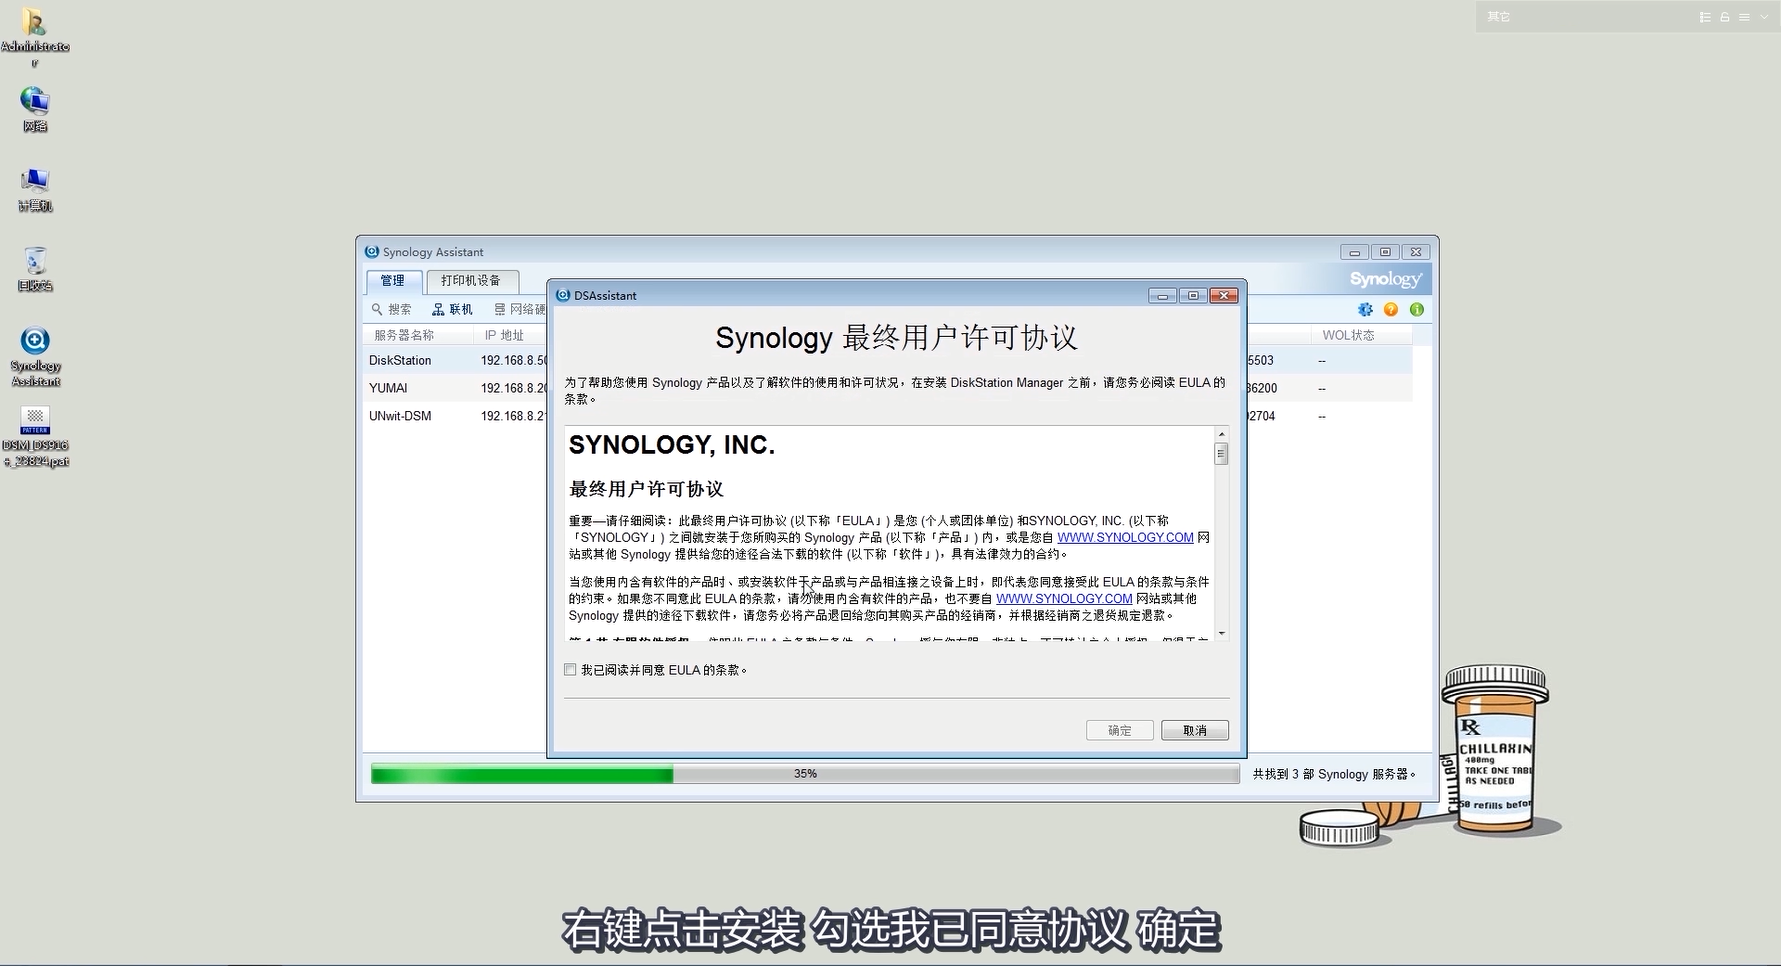
Then follow the process and click to agree to the Synology End User License Agreement.
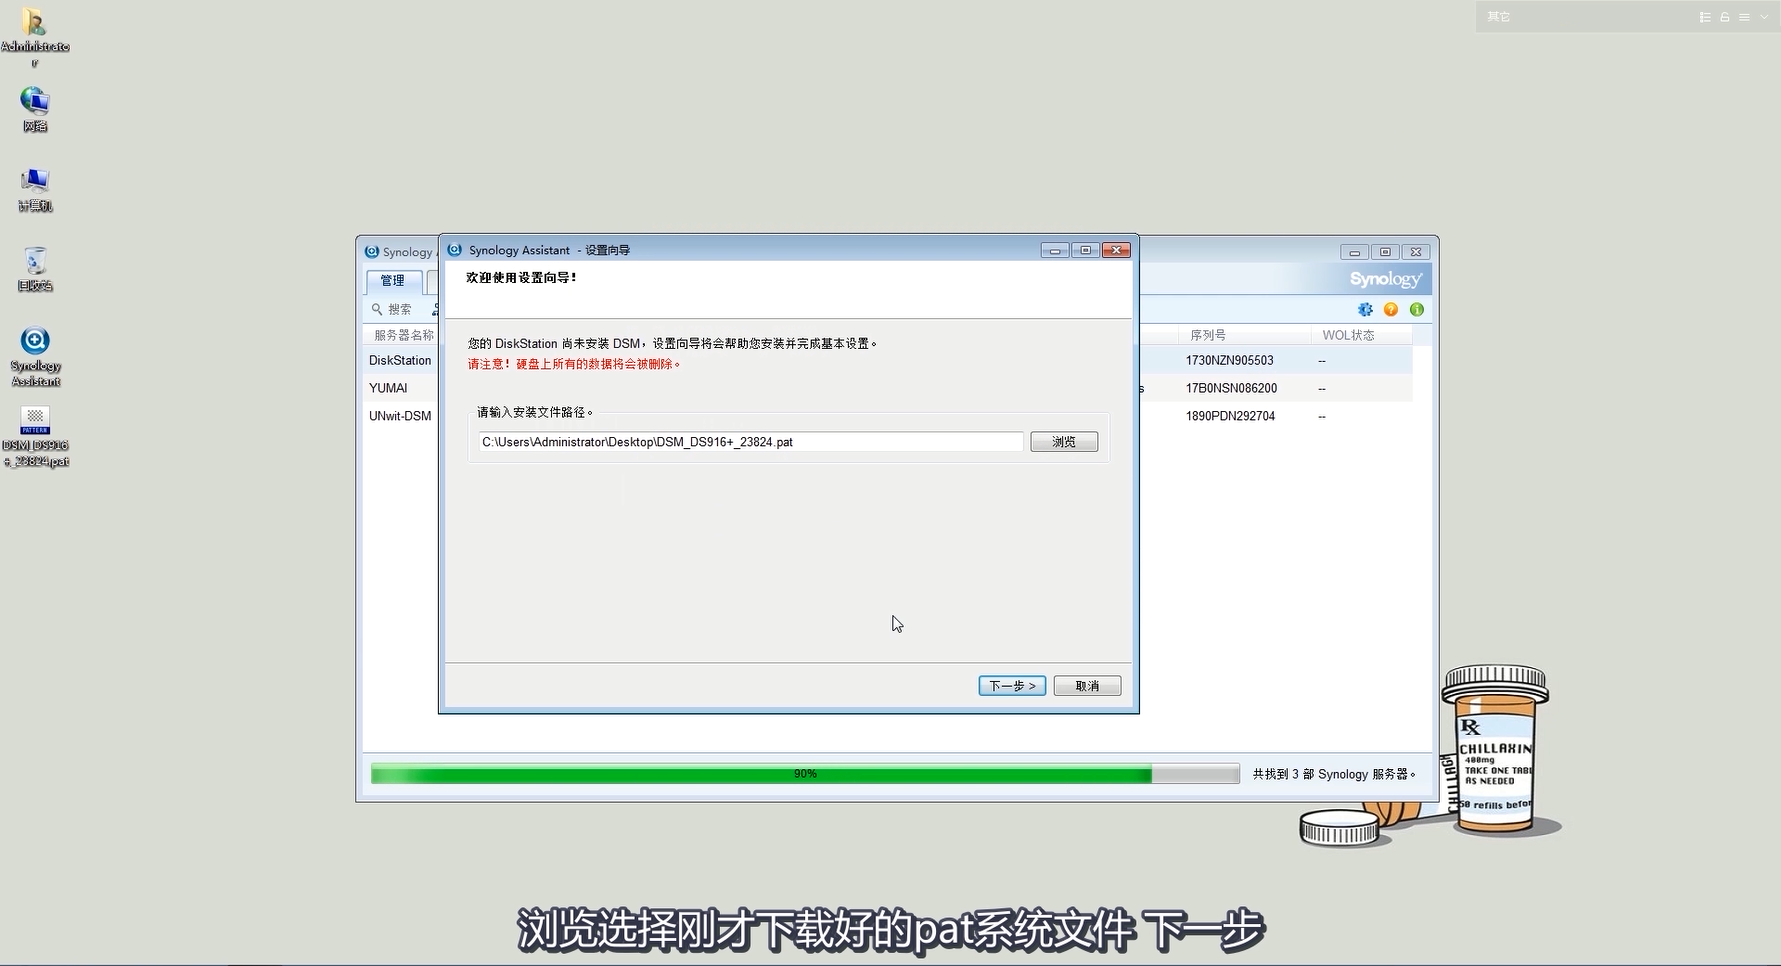
Then the next step is to select the pat file just installed.
Next, enter the administrator's password, you can modify the server name according to your needs, you can also modify it in the system without changing it. Don't check the installation to create Synology Hybrid RAID (SHR) storage space, which is too time consuming. Some users need RAID 5 or other arrays.

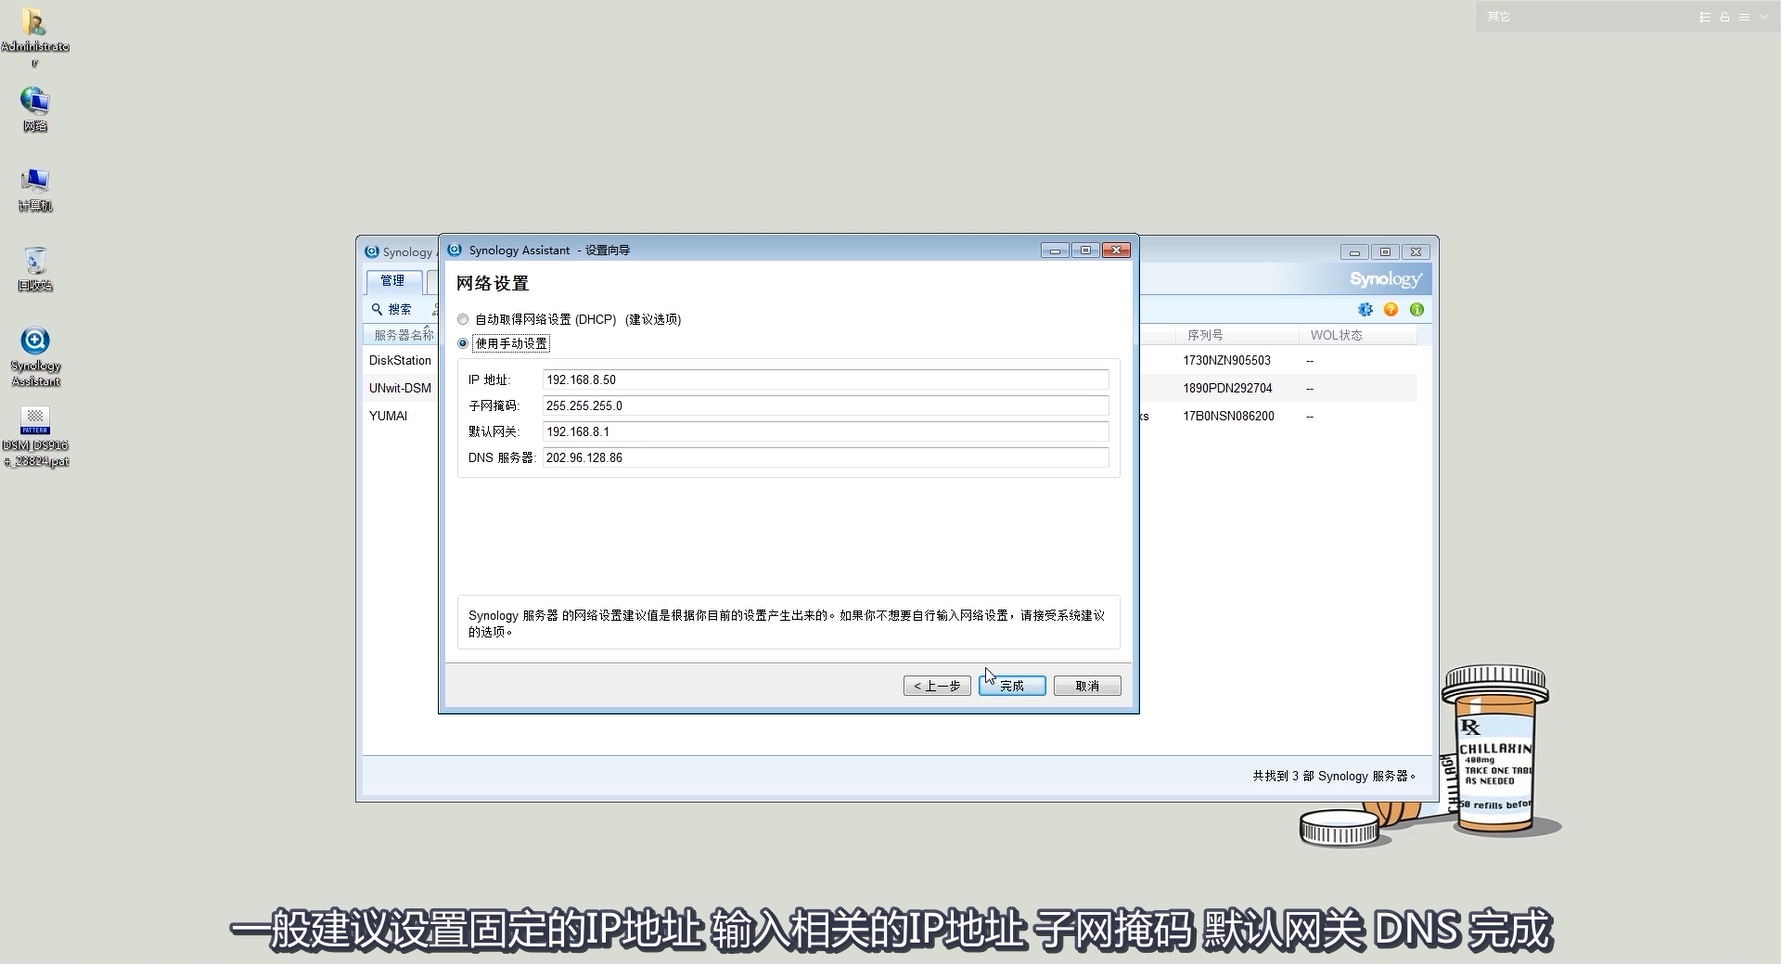
In the next step, enter the network settings interface, set according to the network segment of your own intranet, or you can not consult our online consultation.
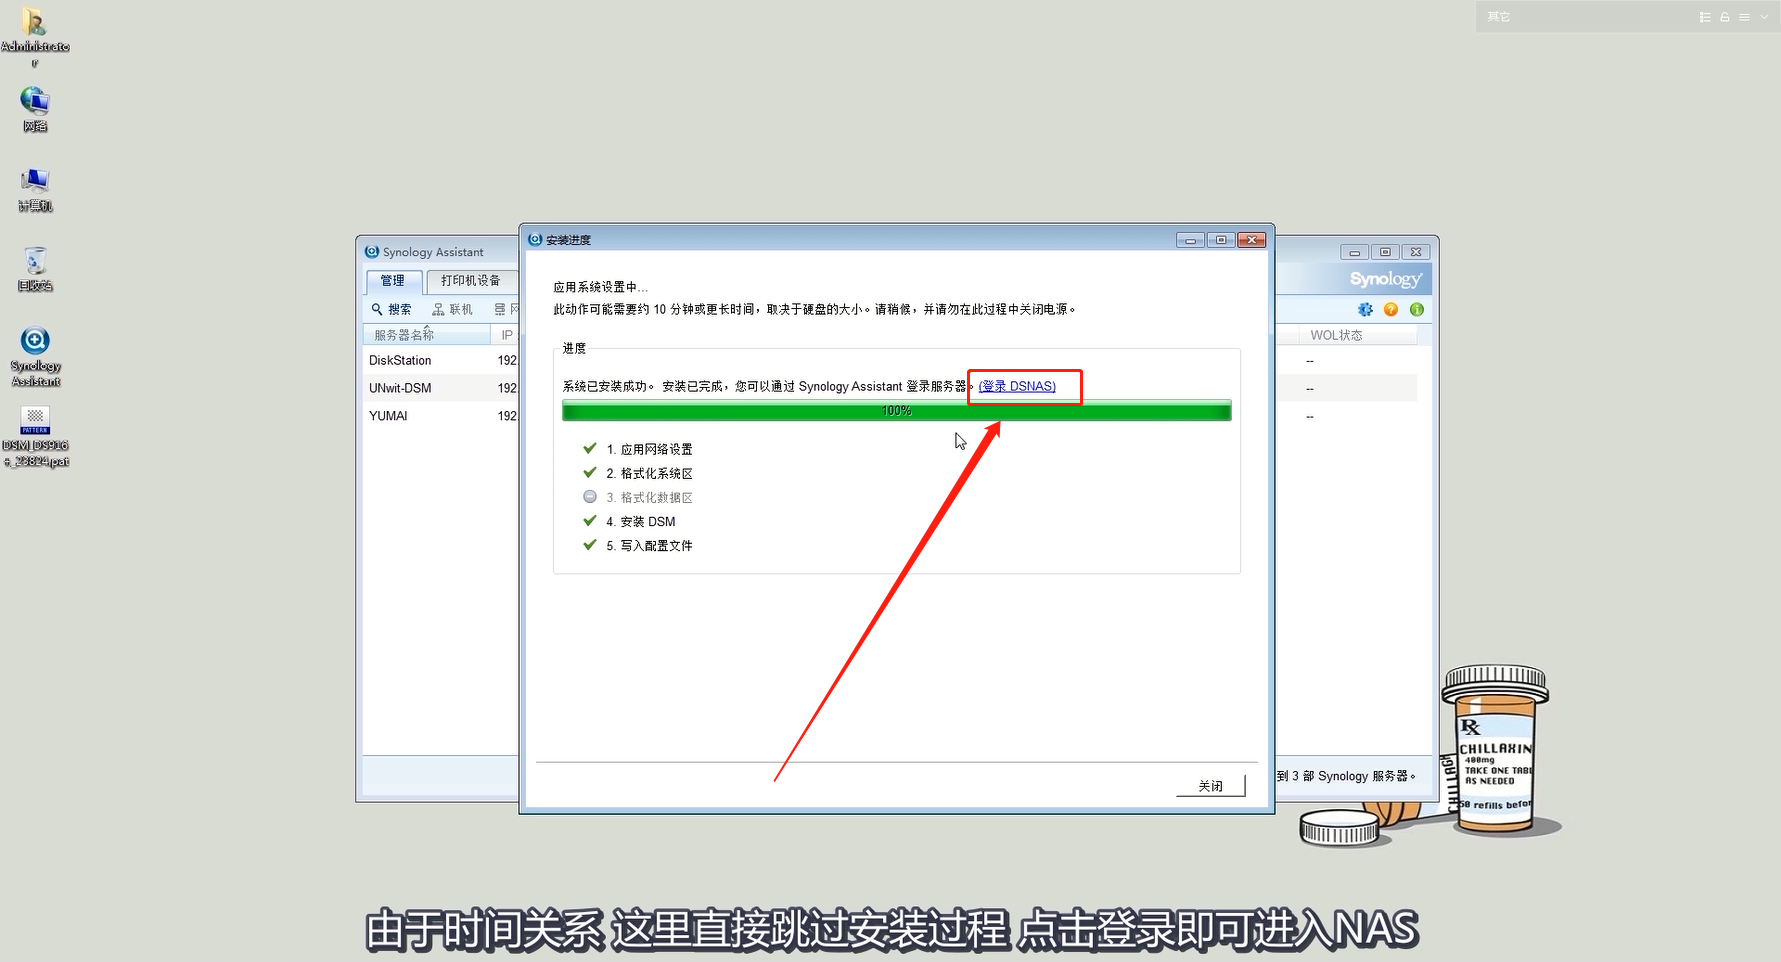
In the next step, enter the automatic installation, wait 10 minutes or longer, depending on the size of the hard drive. Usually it can be installed in 10 minutes. Once installed, click on the login DSNAS in the interface to enter the Synology operating system.
If you accidentally skip this interface, it doesn't matter. If you remember the IP address of the Synology NAS machine set in the network management interface, you can enter that IP address directly in the browser (just like entering the router management interface). If the IP is also forgotten, use the Synology Assistant to scan to obtain the IP address.

Enter the group administrator DSM system interface to enter the set administrator account admin, the password you just created can log in to the Synology DSM operating system. For the first time, you need to set up the Synology DSM update and maintenance, automatic hard disk detection, etc. The Group QuickConnect settings are skipped first, and the external network access requirements can be set later.

